Installation Guide
manishvanga1111@gmail.com2025-07-09T20:43:01+05:30Installation Guide for Shofyd Water Filters
Thank you for purchasing Shofyd Shower and Tap Filter. Please read the instructions manual carefully before use. These instructions tell you how to quickly install and start enjoying your new shower and tap filter. The shower filter installs quickly and easily on any standard 1/2″ threaded connection. For best results, keep water temperature between 40-175°F (or 4-80°C).
Wall Or Overhead Showers
📽️ Step-by-Step Video Guide for Wall or Overhead Showers
🛠️ Step-by-Step Guide for Wall or Overhead Showers
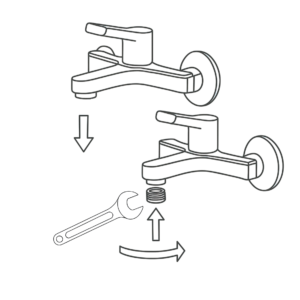
Detach your showerhead and clean the shower arm thread using sandpaper. Wrap the thread with Teflon tape to prevent leaks.

Place two washers inside the top connector of the Shofyd filter and wrap Teflon tape around the bottom connector thread.

STEP 3 – Attach to the Shower Arm
Align the filter’s top connector with the shower arm thread and tighten by rotating clockwise.

Connect your showerhead to the filter’s bottom connector and tighten it. Use a spanner if necessary. If there’s leakage, check the washers and tighten again.

Turn on the water and let it run for 2-3 minutes to remove any dust. This may turn the water gray initially, which is harmless.
Mounting on Taps & Faucets
📽️ Step-by-Step Video Guide for Taps & Faucets
🛠️ Step-by-Step Guide for Taps & Faucets
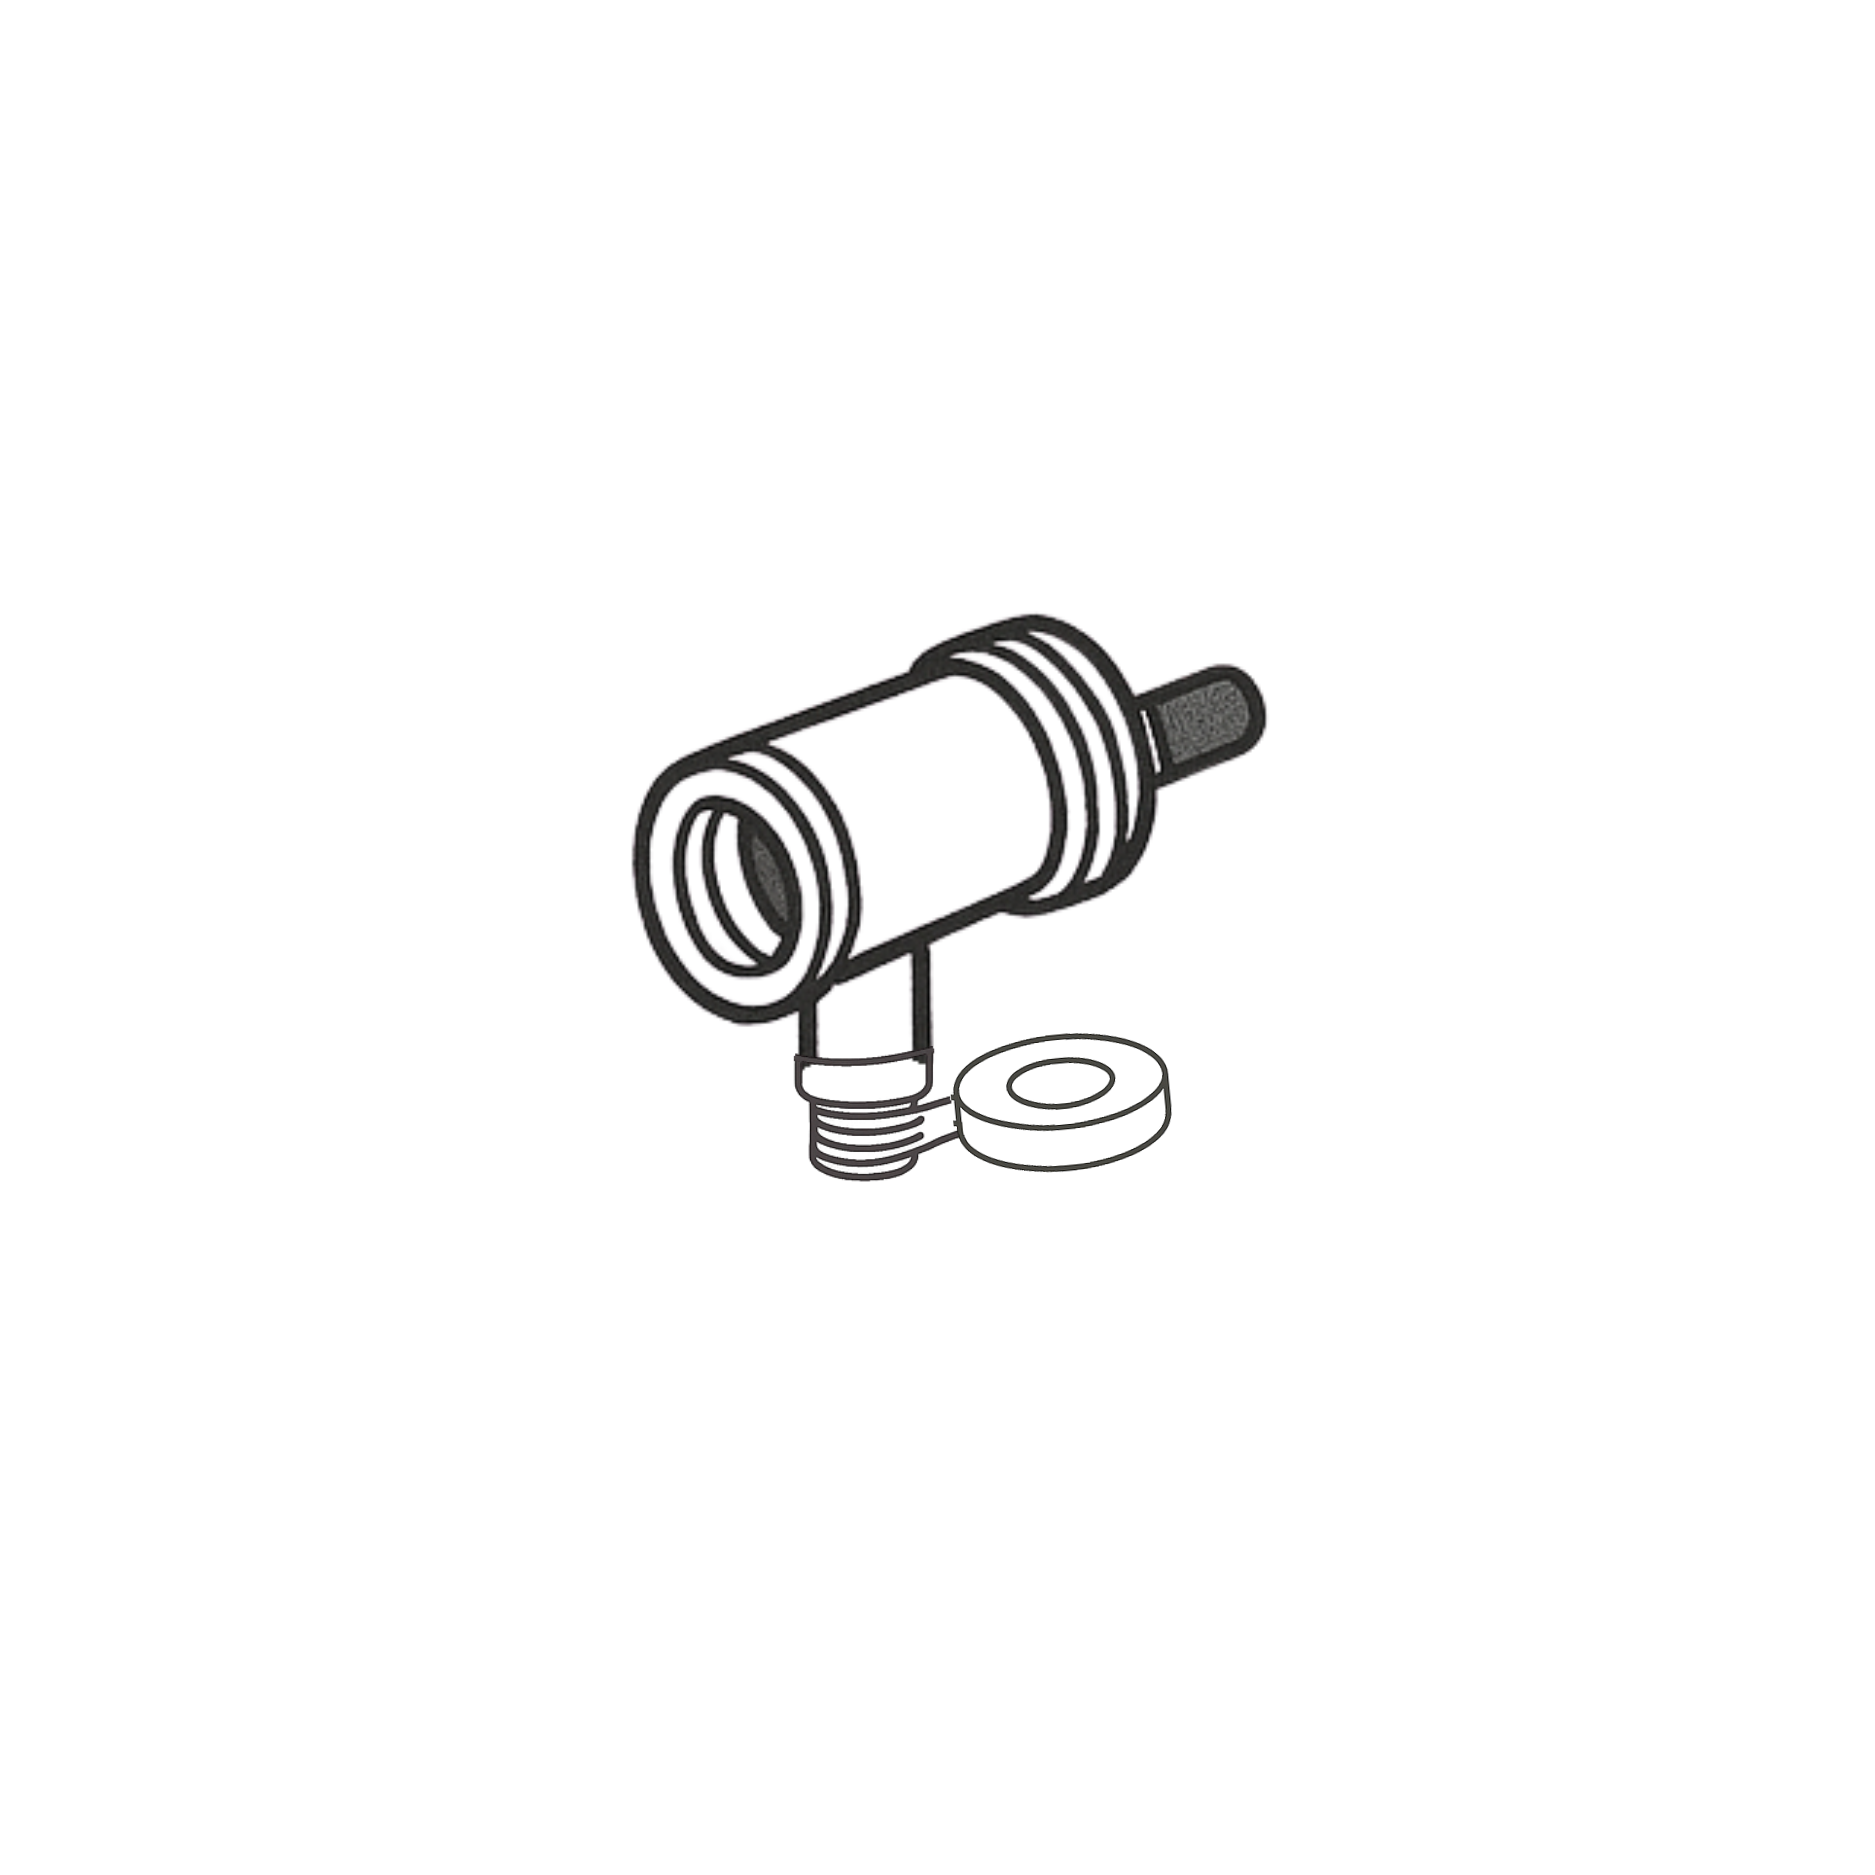
Unscrew the aerator from the tap and replace it with the aerator adapter.
Wrap the adapter’s thread with Teflon tape and insert at least two washers into the filter’s top connector.

STEP 3 – Secure the Filter
Align the filter’s top connector with the adapter and tighten it by turning clockwise.


If there are any leaks, check the washers and tighten again. Use a spanner if needed for a tighter fit.
Turn on the water and let it run for 2-3 minutes to remove any dust. This may turn the water gray initially, which is harmless.
Fitting on Hand Showers
📽️ Step-by-Step Video Guide for Hand Showers
🛠️ Step-by-Step Guide for Hand Showers
Disconnect the hose from the tap and clean the thread. Wrap Teflon tape around it.
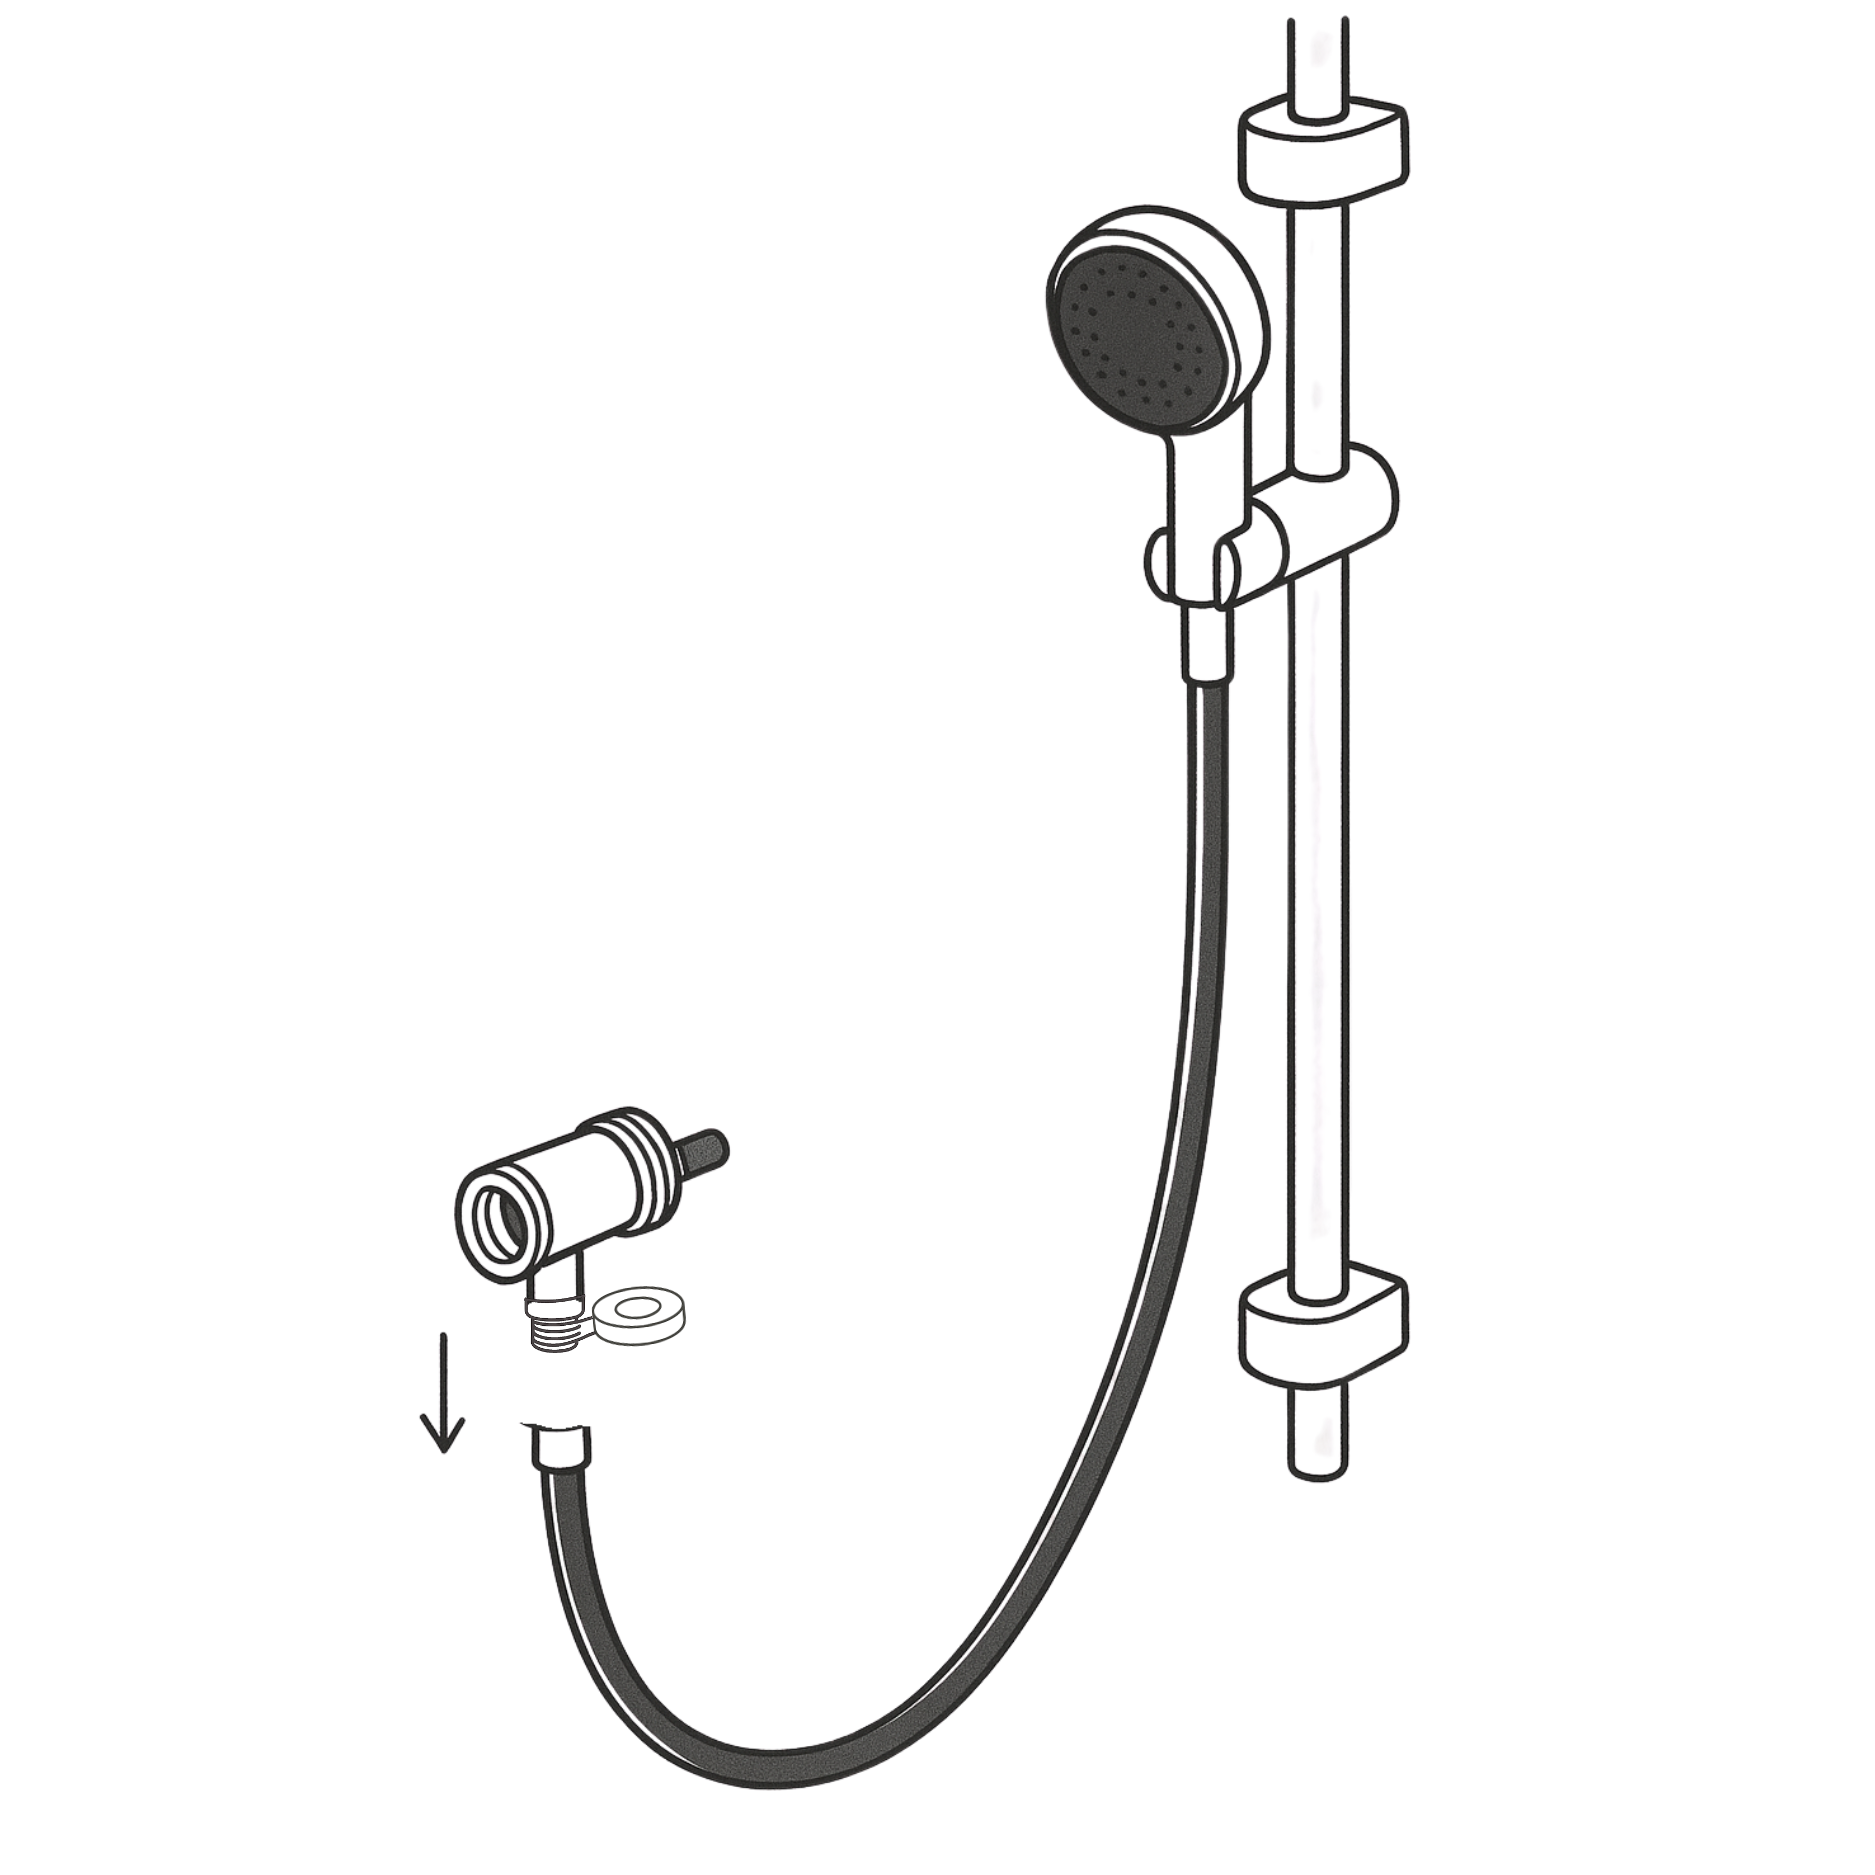
Insert at least two washers into the top connector and apply Teflon tape on the bottom connector thread.
Align the filter’s top connector with the tap’s thread and tighten it clockwise.
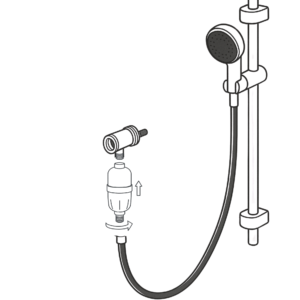
Turn on the water and let it run for 2-3 minutes to remove any dust. This may turn the water gray initially, which is harmless.
Attach the hose to the bottom connector of the filter and tighten fully. Use a spanner if necessary.

Use a spanner if needed for a tighter fit. If there are any leaks, check the washers and tighten again.
Replacing the Filter Cartridge
📽️ Step-by-Step Video Guide to Replace the Filter Cartridge
🛠️ Step-by-Step Guide to Replace the Filter Cartridge
STEP 1 – Open the Filter Housing
Hold the top shell and twist the bottom shell counterclockwise to open.

STEP 2 – Swap the Cartridge
Take out the old cartridge and insert a new one after removing any stickers.

Align the threads of the top and bottom shells and tighten by rotating clockwise.

STEP 4 – Flush Before Use
Turn on the water and let it run for 3 minutes to clear any residual carbon dust.
Troubleshooting
⚠️ Reduced Water Flow Over Time
- The shower filter hasn’t been used for a few days, and trapped sediments may have hardened.
- The cartridge has become clogged with sediment or debris due to poor water quality (common in borewell or high-turbidity water).
- The filter cartridge has reached its lifespan.
- Reverse Flush the Cartridge: Remove the filter and install it in reverse. Let water flow for 5–10 minutes to loosen and flush out any blockages.
- Clean the Mesh Washer: Check and clean the mesh washer or replace it if blocked.
- Replace the Cartridge: If flow is still restricted, your cartridge may have reached its limit of 40,000 liters. Install a fresh one.
⚠️ Water Leakage from the Filter Housing
- Open the filter casing, re-seat the O-Ring correctly, and ensure it’s clean and in place.
- Reassemble the unit and test. The leak should stop.
⚠️ Water Leakage from the Connectors
- Washers may not be seated correctly.
- Shower arm or tap threads may not be sealing tightly.
- Check and adjust washers – some setups may need more than one washer for a snug fit.
- Wrap Teflon/plumber’s tape around the threads for a tighter seal.
- Reattach and tighten the connectors gently to avoid overtightening.